
I have seen these gorgeous bonnets, that some people are using for infant photography. They really appeal to me, as they suit my style and I love delicate, pretty things!
When I set out to find one, I realised they cost a fair amount of money. So, typically, I decided to make my own, and give you a tutorial on how to make your own too.
Be aware, my sewing skills are pretty poor, my machine is a 1966 singer, and this is a photography prop... not for every day use!
Lets get started!
YOU NEED
Scissors.
Fabric
Really wide lace
A sewing machine
Hot glue gun
Fancy wool, that can be pulled out
A beautiful button
Small bit of felt
Pins
Thread... LOL
It will take around 5 minutes to cut it out, five for dying it, a day for it to dry, and around 1 1/2 hours to make. And the cost is around $ 5.00. If you use stuff you already have at home, even better!

To start, you will need to dye your lace or fabric. If you are starting with white, you have so many choices!
I chose to colour mine using tea and coffee! I just took a couple of really long bits or my wool, a piece of my lace and the felt, and dunked them in my bowl with the tea/coffee solution. I left mine for an hour. ( Of course, you could spend a bit of money and get some real dye, and do it according to the instructions.)

This really aged the colour, which I like. You will need to rinse them thoroughly after, and dry them to begin the bonnet.
You will need to cut your fabric into a piece that is 50cm x 25cm. This should fit a child 1-3 years.
I think if you want it for a really little baby, do it at 40 x 20cm. Or smaller!
And you also need two long strips, about 3cm in width and as long as you can get it. These will make the frill, and the bonnet ties.

You will need to sew a edge to the longer sides. I find ironing them first, then sewing them makes it really easy and quick. And you can iron out all the creases in the fabric while your at it!


The Frill was the trickiest bit, for me. ( I'm really not good at sewing, hence the crooked lines!! )
I folded the fabric in half. Then, through trial and error, added my frill, in between each side of the fabric. I pinned each time, so the end result will look something like this...

Then sewed it very slowly, taking the pins out as I went... making sure that the fabric on either side was covering the frill.

Then I sewed all the edges... BUT.. Now this is very important... I made a mistake when putting it together!
Please note, you need a gap for your back ribbon/ wool to fit through, and be pulled tight.
I made it too long and so it ended up looking like this.
Please note, you need a gap for your back ribbon/ wool to fit through, and be pulled tight.
I made it too long and so it ended up looking like this.

When It should look like this...

So, yes, stick to the fabric length which was first suggested, it makes for a much sturdier bonnet!
The ends MUST be left open! ( note the dodgy sewing!!! )
The ends MUST be left open! ( note the dodgy sewing!!! )
All the next photos are done with the first edge, so please understand, your hat will look shorter than the images, because you will have got it right the first time!
Now take the other long strip of fabric, and sew it to the bonnet a shown below...


Now you can add your pretty things. You need not add the wide lace, that I am using. You can add mohair wool, or flowers, or fabric or anything that takes your fancy! Depending on your skills!
I added and measured my lace...

Then I threaded my fancy wool through the gaps, with plenty left at the sides to hang down, with the bonnet fabric ties.

So It ended up looking like this.

Then I used a hot glue gun to stick it on, directly over the fabric used to tie it...


This is what it should look like... with STRAIT sewing and gluing...LOL!
(luckily, it doesn't really matter too much! )

I then made a little flower to glue onto it, using felt cut into a circle, and gluing the same wool onto it, twisting it into a circle till it meets the edge.


The final bit!
Thread some wool, ribbon or string through the back , and gather it in, tight.


Ta Da!!!


And I guess I will be using it, at the next girlie shoot! Hmmm, this was actually quite easy, so I think I might go and get some different fabric and make some more, it's always quicker the next time you try something!
Have fun!

Don't forget to tuck the ends of the lace in, it's neater that way.

This is what it should look like... with STRAIT sewing and gluing...LOL!
(luckily, it doesn't really matter too much! )

I then made a little flower to glue onto it, using felt cut into a circle, and gluing the same wool onto it, twisting it into a circle till it meets the edge.
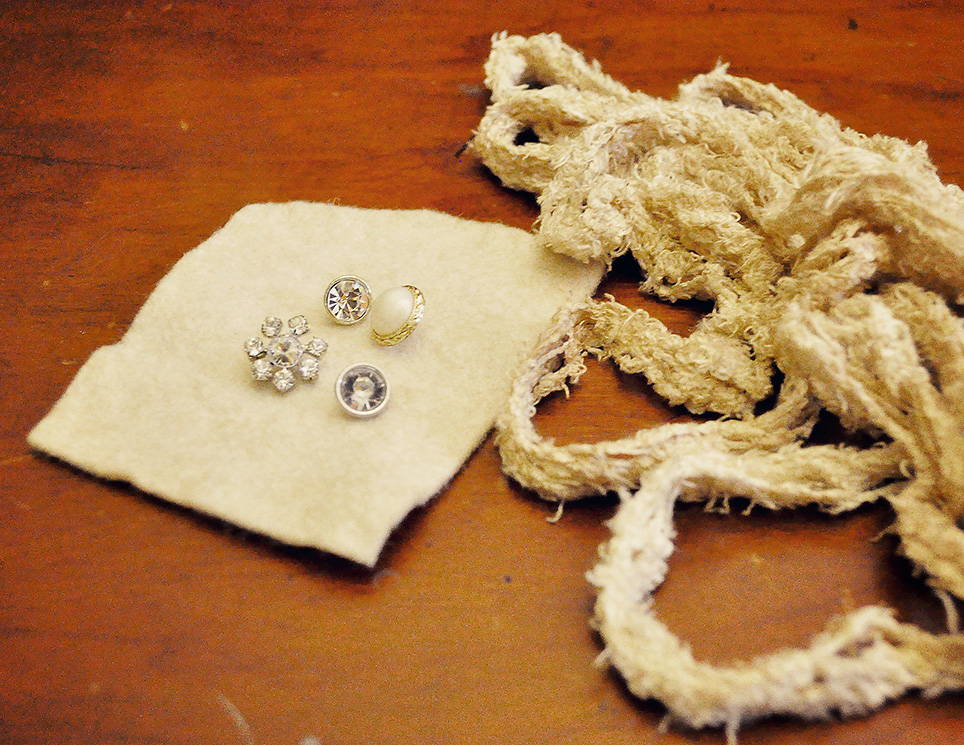


Then I glued a pretty button on.

And I added a strand of wool onto the back too, this gave it some extra interest.

Glue it on!

The final bit!
Thread some wool, ribbon or string through the back , and gather it in, tight.


Tie it in a knot, to hold it, and a pretty bow.

Ta Da!!!


And I guess I will be using it, at the next girlie shoot! Hmmm, this was actually quite easy, so I think I might go and get some different fabric and make some more, it's always quicker the next time you try something!
Have fun!


