Wednesday, 26 February 2014

Little Red Hen

One of our Little Brown Hens. I adore my chooks! Their so sweet! They never peck and always run up to greet us! So much fun for the children, to collect their eggs, too! Once you have had then, you will never look at supermarket meat the same way, again!


Little nest with her eggs!
 

Fennel

Growing along the side of the road. I always look at it as I drive my children to school. 
The smell is almost aniseed - ish, and quite strong. But the plant is quite fragile, with its feathery leaves and delicate flowers.


I used my action Ring - a - Ring - a - Rosie for this edit, with one of my sun flare textures added.
You can get the action at my etsy store 


Bees and pollen


 At my sons school there is a beautiful garden, where all the children have a plot in which they grow veggies and flowers. These are some of the gorgeous sunflowers that are there! What's more to love than a sweet buzzy bee collecting pollen!


Just living is not enough. One must have sunshine, freedom and a little flower. 
~ Hans Christian Anderson

Gerda

... Just at this moment it happened that little Gerda came through the great door of the castle. Cutting winds were raging around her, but she offered up a prayer and the winds sank down as if they were going to sleep. She went on till she came to the large empty hall, and caught sight of Kay. She ran toward him and threw her arms round his neck. Gerda held him fast, while she exclaimed, “Kay, dear little Kay, I have found you at last.”

But he sat quite still, stiff and cold.

Then little Gerda wept hot tears, which fell on his breast, and penetrated into his heart, thawed the lump of ice and washed away the little piece of glass which had stuck there. Then he looked at her, and Kay burst into tears. He wept so that the splinter of glass swam out of his eye. 

 Then he recognized Gerda, and said, joyfully, “Gerda, dear little Gerda, where have you been all this time, and where have I been?” And he looked all around him and said, “How cold it is, and how large and empty it all looks!” He clung to Gerda, and she laughed and wept for joy. It was so pleasing to see them that the pieces of ice even danced about and when they were tired and went to lie down, they formed themselves into the letters of the word which the Snow Queen had said he must find out before he could be his own master, and have the whole world and a pair of new skates. 

Then Gerda kissed his cheeks, and they became blooming; and she kissed his eyes, and they shone like her own. She kissed his hands and his feet and then he became quite healthy and cheerful. The Snow Queen might come home now when she pleased, for there stood his certainty of freedom, in the word she wanted, written in shining letters of ice. Then they took each other by the hand, and went forth from the great palace of ice. 

Gerda.


Wednesday, 22 January 2014

Just Beautiful.

 
My friend came over to let me have a play at photographing her beautiful person!
I love the results! Of course, there are images which I have chosen not to share, as she would like to keep things bit private.. (who can blame her! )

I am so glad we got the time to take these images. Something special to show her grandchildren, one day. How beautiful she once was.

How gorgeous she is now!

Flower Fairy (Fae)!

Gosh, I adore finding these! I have taken images of pretty flowers and, after using my "flip it" action, found these extraordinary images which I like to call my flower fae!


 This is what the original "flipped" canvas looks like.
 I am particularly fond of this one. Maybe because she has tears.

A day at the beach

Gosh it's been , like, forever since I blogged! That's pretty bad, if you asked me! To make up for it, I will inundate you with a whole lot of stuff! LOL.

Firstly, for the new year I went to middleton beach with my friends. Here are a few snapshots of the time I spend with the girls!


Middleton Beach, South Australia. Sunset. Jan 2014


Monday, 18 November 2013

Playing around with Cabinet Cards!


 As you may well know, I love to play around with creating old styled images.  Just playing with cabinet cards at the moment. Their kind of fun to do! The images are mine, the cards are from my free PNG kits, which you can download at my Deviant Art page.


Mine


Just a quick post of two little people that are especially special to me. Yea, you guessed it, my own!


Tuesday, 6 August 2013

Intense B&W

Having a little bit of a love affair with black and white.


Wednesday, 17 April 2013

Passing The Time...

I'm sick, with the flu. It just about kills me, that all I can do is sit around and mooch, because I really don't have the energy for much else!
Luckily, my children have all had it, too, so spending time photographing them is not a problem!


Friday, 29 March 2013

My Girl


A quick photo session, taken by the front door... So glad I did it!


Thursday, 28 March 2013

How To Make A Vintage Bonnet


I have seen these gorgeous bonnets, that some people are using for infant photography. They really appeal to me, as they suit my style and I love delicate, pretty things!

When I set out to find one, I realised they cost a fair amount of money. So, typically, I decided to make my own, and give you a tutorial on how to make your own too.

Be aware, my sewing skills are pretty poor, my machine is a 1966 singer, and this is a photography prop... not for every day use!

Lets get started!

YOU NEED 

Scissors.
Fabric
Really wide lace
A sewing machine
Hot glue gun
Fancy wool, that can be pulled out
A beautiful button
Small bit of felt
Pins
Thread... LOL


It will take around 5 minutes to cut it out, five for dying it, a day for it to dry, and around 1 1/2 hours to make. And the cost is around $ 5.00. If you use stuff you already have at home, even better!


To start, you will need to dye your lace or fabric. If you are starting with white, you have so many choices!

I chose to colour mine using tea and coffee! I just took a couple of really long bits or my wool, a piece of my lace and the felt, and dunked them in my bowl with the tea/coffee solution. I left mine for an hour. ( Of course, you could spend a bit of money and get some real dye, and do it according to the instructions.)


 This really aged the colour, which I like. You will need to rinse them thoroughly after, and dry them to begin the bonnet.

You will need to cut your fabric into a piece that is 50cm x 25cm. This should fit a child 1-3 years.
I think if you want it for a really little baby, do it at 40 x 20cm. Or smaller!

And you also need two long strips, about 3cm in width and as long as you can get it. These will make the frill, and the bonnet ties.


You will need to sew a edge to the longer sides. I find ironing them first, then sewing them makes it really easy and quick. And you can iron out all the creases in the fabric while your at it!


The Frill was the trickiest bit, for me. ( I'm really not good at sewing, hence the crooked lines!! )

I folded the fabric in half. Then, through trial and error, added my frill, in between each side of the fabric. I pinned each time, so the end result will look something like this...


Then sewed it very slowly, taking the pins out as I went... making sure that the fabric on either side was covering the frill.


Then I sewed all the edges... BUT.. Now this is very important... I made a mistake when putting it together!
Please note, you need a gap for your back ribbon/ wool to fit through, and be pulled tight.
  I made it too long and so it ended up looking like this.


When It should look like this...


 So, yes, stick to the fabric length which was first suggested, it makes for a much sturdier bonnet!

The ends MUST be left open! ( note the dodgy sewing!!! ) 

All the next photos are done with the first edge, so please understand, your hat will look shorter than the images, because you will have got it right the first time!

Now take the other long strip of fabric, and sew it to the bonnet a shown below...


Now you can add your pretty things. You need not add the wide lace, that I am using. You can add mohair wool, or flowers, or fabric or anything that takes your fancy! Depending on your skills!

I added and measured my lace...


Then I threaded my fancy wool through the gaps, with plenty left at the sides to hang down, with the bonnet fabric ties.


 So It ended up looking like this.


Then I used a hot glue gun to stick it on, directly over the fabric used to tie it...


Don't forget to tuck the ends of the lace in, it's neater that way.


This is what it should look like... with STRAIT sewing and gluing...LOL!
(luckily, it doesn't really matter too much! )


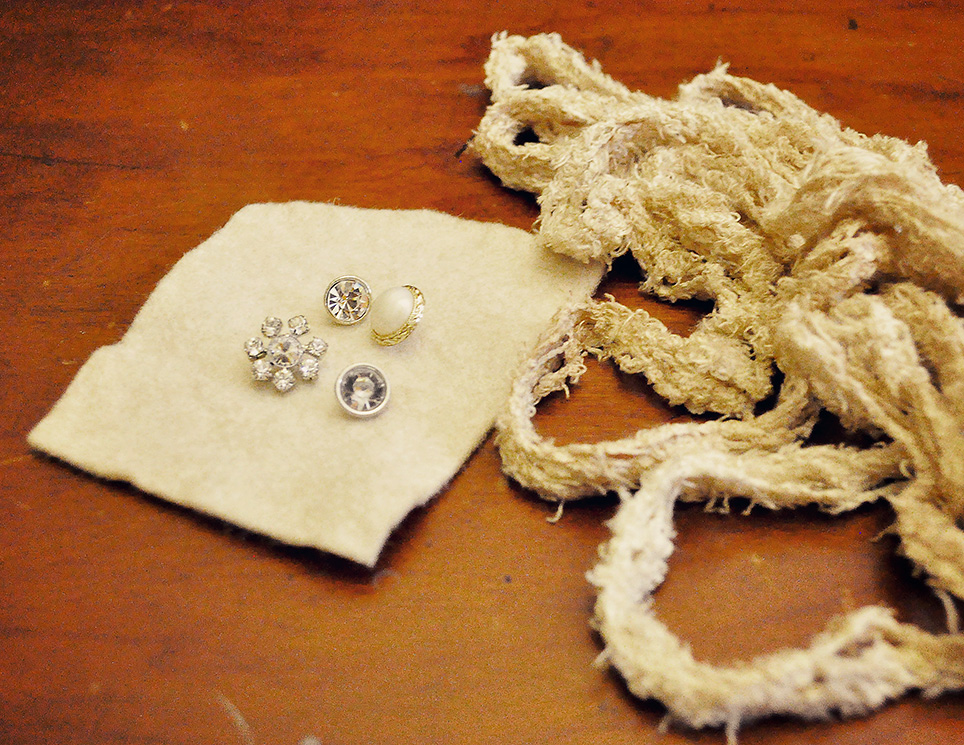
I then made a little flower to glue onto it, using felt cut into a circle, and gluing the same wool onto it, twisting it into a circle till it meets the edge.


Then I glued a pretty button on.


And I added a strand of wool onto the back too, this gave it some extra interest.


Glue it on!


The final bit!

Thread some wool, ribbon or string through the back , and gather it in, tight.


Tie it in a knot, to hold it, and a pretty bow.


 Ta Da!!!


And I guess I will be using it, at the next girlie shoot! Hmmm, this was actually quite easy, so I think I might go and get some different fabric and make some more, it's always quicker the next time you try something!

Have fun!